EDIT 29TH MAY 2018:
This is now a partly outdated method for doing fascia work.
Recommended workflow is moving toward coupling a fascia cloth and fat tissue together in one pass.
We no longer recommend colliding with a polyCombined version of the underlying muscle/bone meshes.
This causes intersections between the islands of the combined object, which Ziva sees as self-intersections. Self intersections cause trouble for our collision model which is why people were reporting explosions in the comments below.
We have video tutorials coming out in the next few weeks which will explain the process explicitly.
END EDIT
People like the idea of a 'fascia pass' after they run their muscle/bones solve.
In nature the fascia is an incredibly complex structure with varying properties running over and between many muscle groups.
A simple fascia pass that envelops the muscle and bones can be useful for creating a continuous mesh that you can slide fat and/or skin over in a tertiary pass.
Here's the bones of the workflow
Creating the fascia mesh:
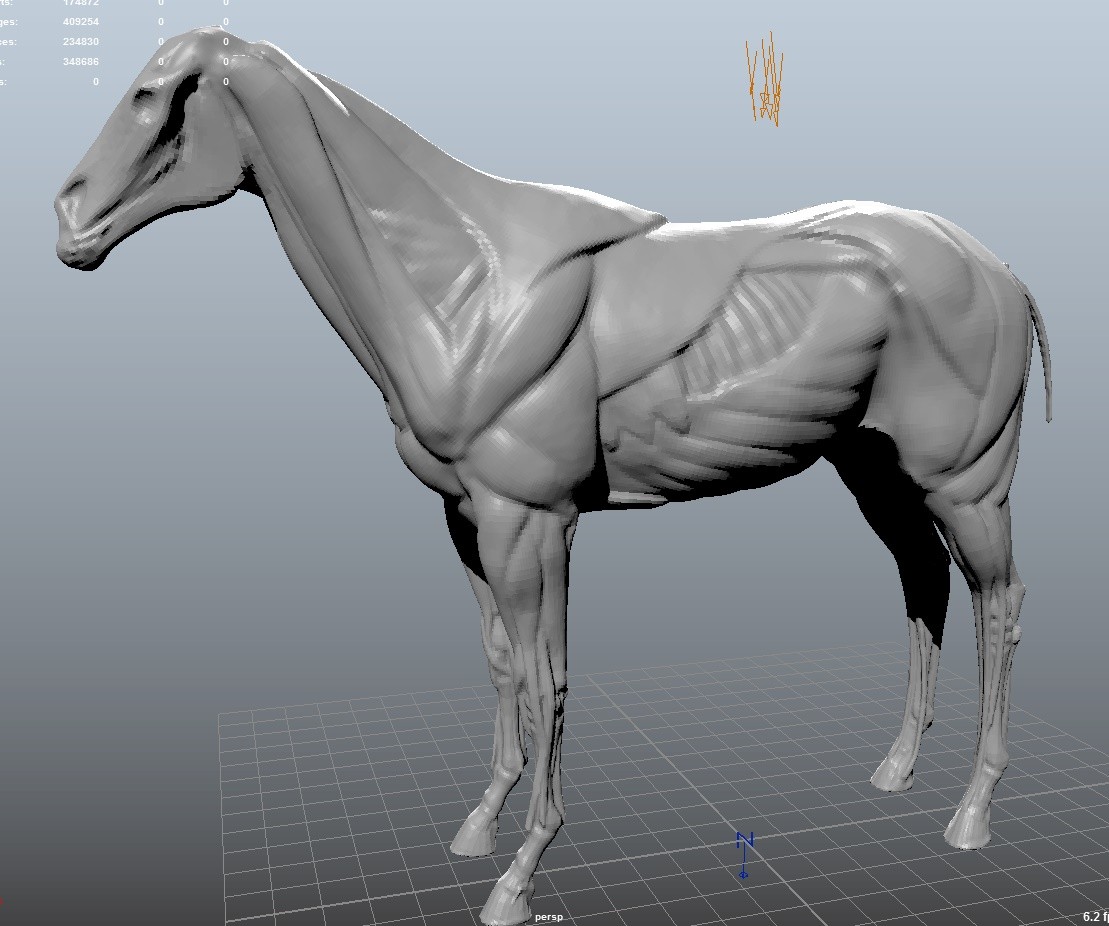
- Here's a horse model muscle / bones. I combined the meshes and decimated a bit.
Original modeling work by Chenchen Ji 纪琛琛.

- I used nCloth to shrink down a smoothed duplicate of the skin model onto the muscles and bones. Then I used Mudbox to do a retopo:
Convert the fascia to Ziva cloth by selecting the fascia mesh, and running Ziva > Cloth
Convert the combined muscles bones mesh to a Ziva bone by selecting it and running Ziva > bone
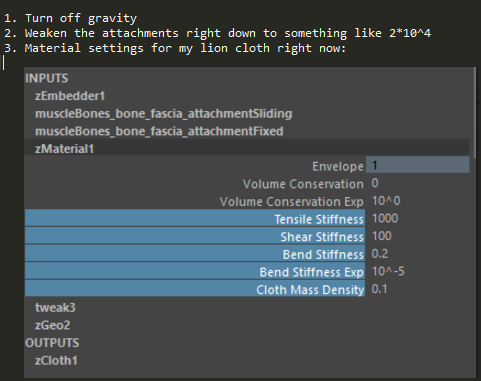
Make a fixed attachment with the fascia as the source by selecting the fascia, then the combined muscle bones object and running Ziva > Attachment.
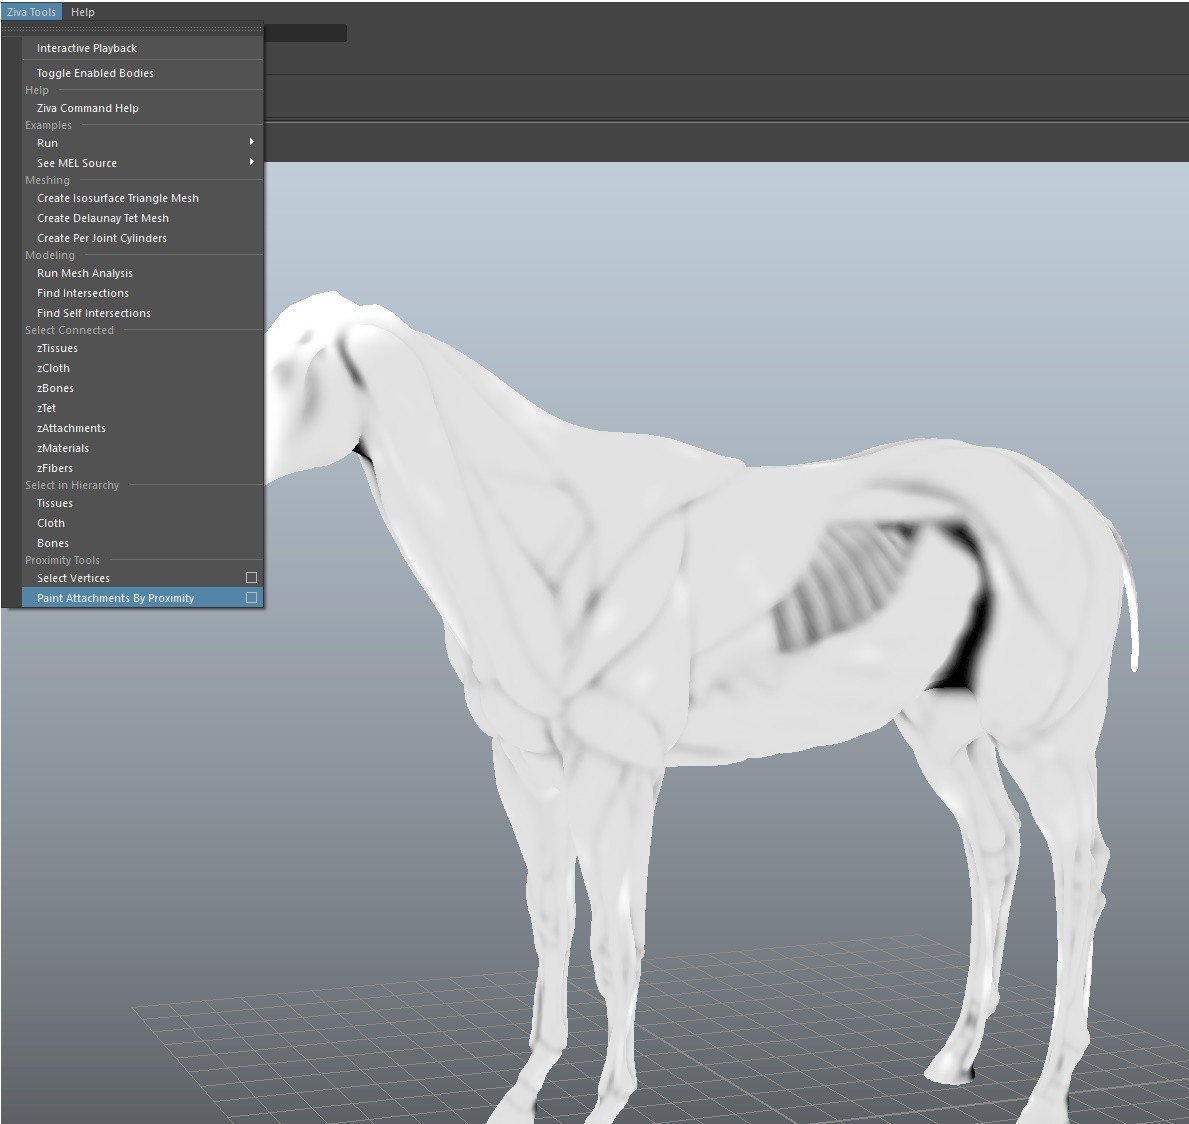
Play with the paintWeightsByProximity tool in the menu. Select the attachment you just made, and run: Ziva Tools > Paint Attachment by Proximity [option box]
Those two values will do a distance look up for every vertex on the source mesh of your attachment. It will paint the map according to the values you enter.
Default is 0.5 - 2.0, so if the target mesh is closer than 0.5 units for that vertex, it will get a value of 1.0. Anything further away than 2.0 will get a value of 0. With everything in between interpolated.
The reason we do this is so that in the areas where there isn't a muscle or bone directly beneath the cloth, we want the cloth free to do it's thing. This will avoid the cloth shearing.
Most of the time I will have the fixed attachment quite weak, paint it to zero in many places like across the lats and rib cage, and replace those areas with sliding so that we can we see the forms coming and going. Please see my post on attachments for more info on this.
Here's what my initial map ended up looking like:
- Wrap your combined muscles bones mesh to an alembic bake of your muscles bones solve and you should be in a good place to start.
If you're running collisions (gives the best results!) don't forget to turn collisionVolume off on your combined muscle/bone zBone object if that is self intersecting, which it most likely will do from time to time.
Feel free to add further discussion about the fascia below.
Cheers,
Andy